How to Add Custom Checkout Fields to Your WooCommerce Store
Peyton Hamel on | 3 min read
In WooCommerce, custom fields can be added by using hooks, filters, and actions provided by the platform or by using plugins that allow for easy creation and management of custom fields. PeachPay provides a simple method to add any desired custom field to a checkout section.
Benefits of Adding Custom Fields
First, let’s review the benefits of adding custom fields to a checkout section:
-
Collecting customer data: By adding checkout fields, you can collect important customer data such as shipping and billing addresses, email addresses, phone numbers, and more. This information can be used for future marketing efforts or to provide enhanced customer service.
-
Customizing checkout process: You can add fields to the checkout process that are specific to your business, such as special instructions or gift wrapping options. This allows you to tailor the checkout experience to your customers and create a unique shopping experience.
-
Reducing cart abandonment: The fewer steps a customer has to go through to complete a purchase, the less likely they are to abandon their cart. By collecting all the necessary information in one step via custom fields, you can reduce the likelihood of customers leaving your site before completing their purchase.
-
Compliance with legal requirements: Depending on your location and the products you sell, you may be required by law to collect certain information from customers during the checkout process. Adding checkout fields ensures that you are complying with any legal requirements in your area.
Options at PeachPay
PeachPay’s platform allows you to add any custom field to your checkout, ensuring a smooth and customer-based experience. To view some of the default fields WooCommerce checkouts have, view one of our other articles here. Below, you will find a step-by-step guide on how to add custom fields to the checkout on your WooCommerce store.
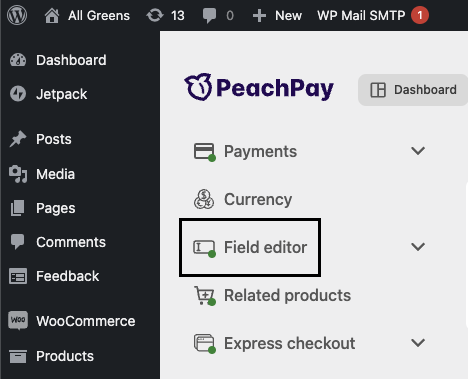
- When you log into your online store, you will find your main menu. On the main menu, click on “Field Editor” on the left column.
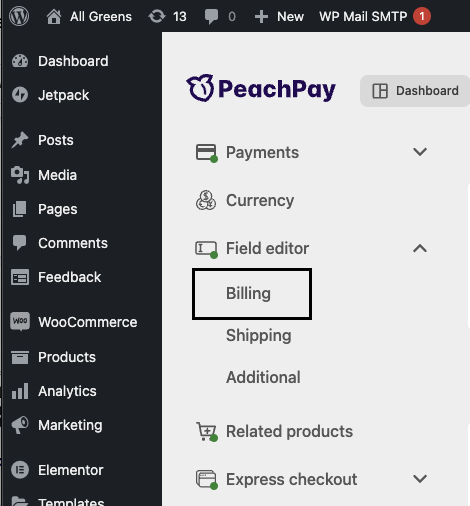
- You will find three drop-down options available, each one indicating an individual section of the checkout. For this example, we will click on “Billing.”
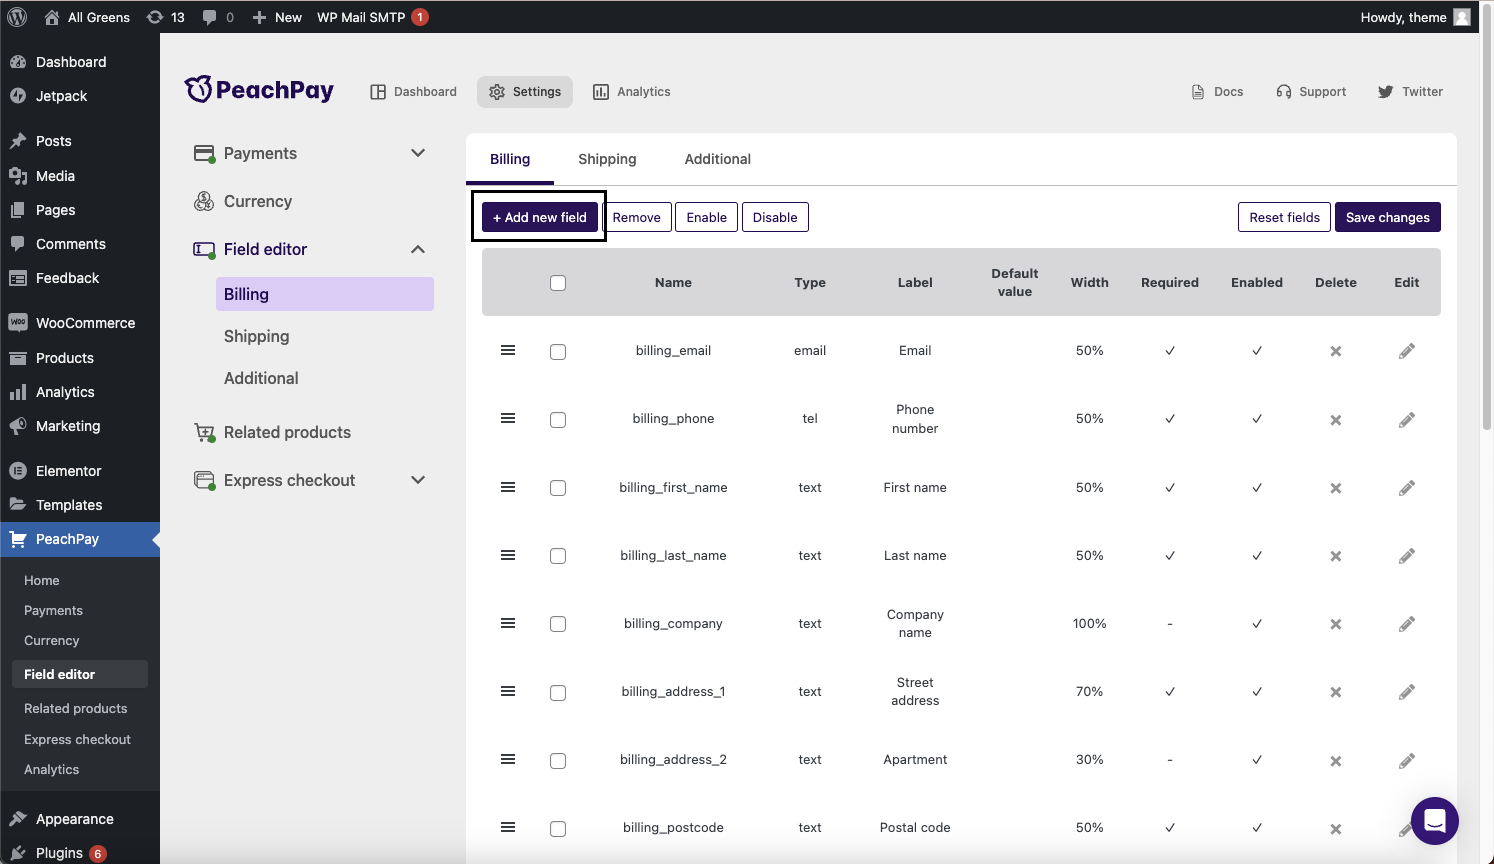
- A large menu with dozens of fields will appear. This menu will allow you to add new fields, adjust the order of fields through drag-and-drop, and manipulate the size of each field as it appears on the customer side of the checkout page. In order to add a new field, click on “+ Add new field” below “Shipping” and above the field menu.
- The menu for adding a new field should look like the following, with various options to personalize the field to your liking.
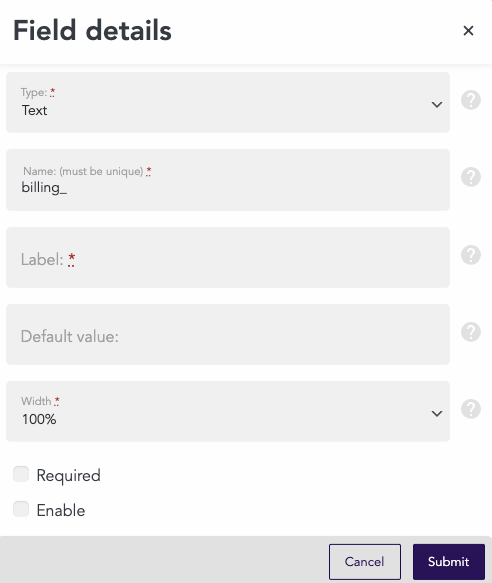
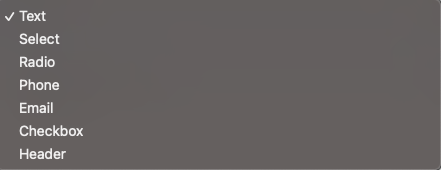
- The first drop-down option allows you to select the type of field you want, which adjusts the function and appearance. From regular text options to bubble options (Radio), you can customize how it appears on the checkout page.
-
The second customization is “Name: (must be unique).” The name of the field does not show up on the checkout section. Those with access to the PeachPay interface that customizes your store will be able to see it in the large field menu. It is recommended to choose a name related to the function and will be recognizable to you.
-
The third customization is “Label:.” The label is what will show on the customer checkout section.
-
The fourth customization is optional and not necessary for all fields. A default value is something that will automatically show up in the field without the customer selecting anything in the checkout yet. You can set a value for this field that should be already prefilled when the shopper opens the checkout.
-
Finally, the fifth customization will personalize how large you want the section to appear on the checkout. The width appears on percentages, which directly correlates to the percentage of the screen that it fills on the checkout section. Adjust it to your liking to further personalize your shopper experience. There are four options available:

-
There are two bubble options at the bottom called “Required” and “Enable.” You can choose to require this field during checkout or enable it if your shopper chose a specific selection.
-
Once you are done editing your new field, select “Submit” at the bottom right of the menu. It will then appear on the large field menu. Remember to adjust where you want it to appear on your checkout section through dragging-and-dropping it in the menu. The top fields will appear first, and the bottom will appear last.

Leave it up to PeachPay
PeachPay is an all-encompassing online checkout platform with features you need to customize a better shopping experience. With PeachPay, you are now ready to personalize and finalize your checkout section for your WooCommerce store. The Express Checkout that PeachPay offers to your checkout eliminates unnecessary and repetitive processes that are evident in normal checkouts.
Further Readings
Here are a couple other articles you might find useful: