How to Set Up a Redirect after Checkout in WooCommerce
David Mainayar on | 7 min read
Whether it's to thank them for their purchase or to upsell them on related products, it's important that you send your customers to the right page after they've completed their transaction. By default, WooCommerce will take customers to the "Thank You For Your Order" page after checkout. However, you can easily change this behavior by setting up a redirect.
There are some factors you should consider before setting up a redirect. For example, you need to decide where you want to send your customers and whether you want to redirect all customers or just certain ones.
This post will show you how to set up custom redirects after checkout in WooCommerce and how they can be used to improve your store and user experience.
Why Should You Set up a Redirect After Checkout?
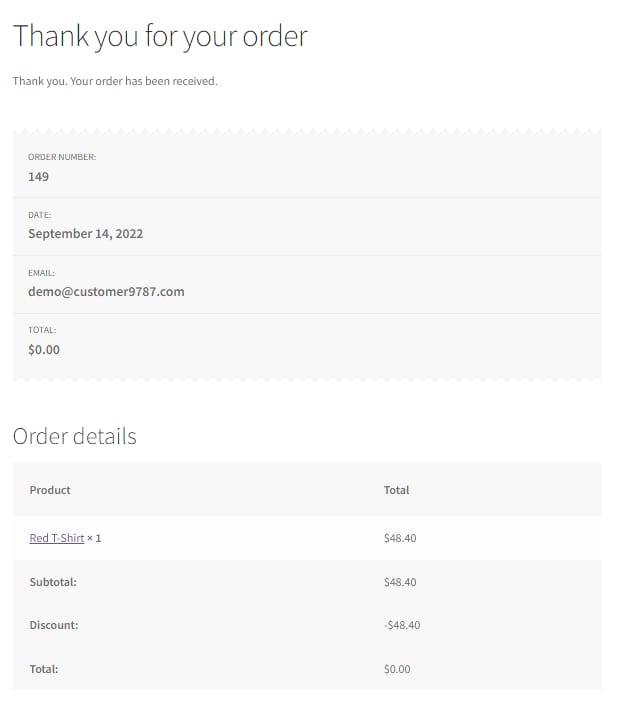
When a customer clicks the "Place Order" button on your WooCommerce store, they are automatically redirected to the "Thank You" page you have set up. This is the page where you provide them with their purchase information, such as a receipt or order confirmation.
While the thank you page is a great place to provide additional information to your customers, you may also want to use it to redirect them to another personalized, conversion-optimized page after they have completed their purchase.
For example, you may want to redirect them to your homepage or a specific product or category page based on their purchases. This can be helpful if you want to promote other products or services on your site or if you want to encourage customers to return to your store in the future.
The thank you page is also where you can provide your customers with additional links, such as a link to your store's blog or your social media accounts.
- Other ways to take advantage of the thank you page include:
- Upsell products to customers – include products you have on discounts or offers.
- Collect customer feedback – use a survey or poll to collect customer feedback.
- Encourage customers to sign up for your newsletter or reward program.
- Show a more detailed summary of the customer's order – this can include the order number, purchased products, purchase date, estimated delivery time, delivery tracking, and more.
No matter how you set up your redirect after checkout, you must take the time to configure it correctly and tailor it to fit your business goals. This will help ensure that your customers have a positive experience on your site and are directed where you want them to go after completing a purchase.
Why Does the Checkout Process Matter?
Checkout is one of the most crucial aspects of any eCommerce store. It's the final step in the customer's journey, where they complete their purchase. This is the make-or-break point. If the checkout process is confusing or difficult to use, it can cause customers to abandon their carts and never come back.
The default WooCommerce cart and checkout process takes a lot of steps, which can frustrate the customer – from the add to cart button on the product page, to the shopping cart page, the shipping details page, and finally to the payment page. Those are a lot of steps and cart pages, and a lot of opportunities for your customers to decide they don’t want to buy from you after all.
Losing a customer at this stage will negatively impact your revenue, increase customer acquisition and retargeting costs, and make inventory management difficult. That's why taking the time to optimize your checkout process is crucial.
How Do I Optimize the Checkout Process?
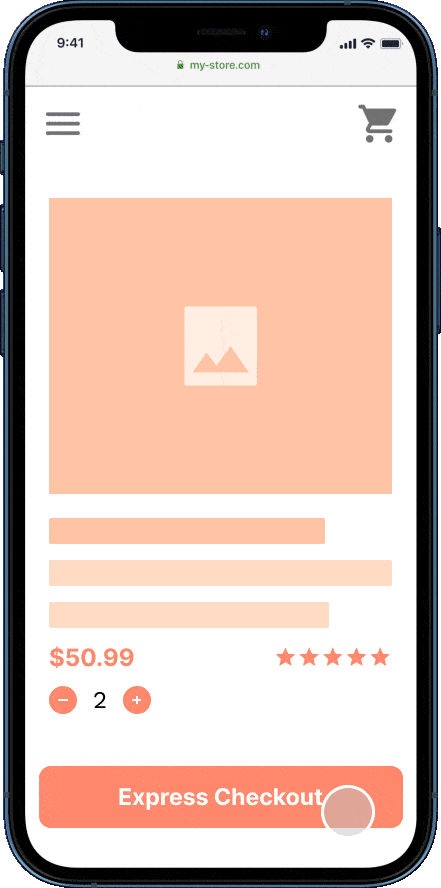
If you're looking for a way to improve your checkout process and reduce the chances of customers abandoning their carts, PeachPay could be the solution you're looking for.
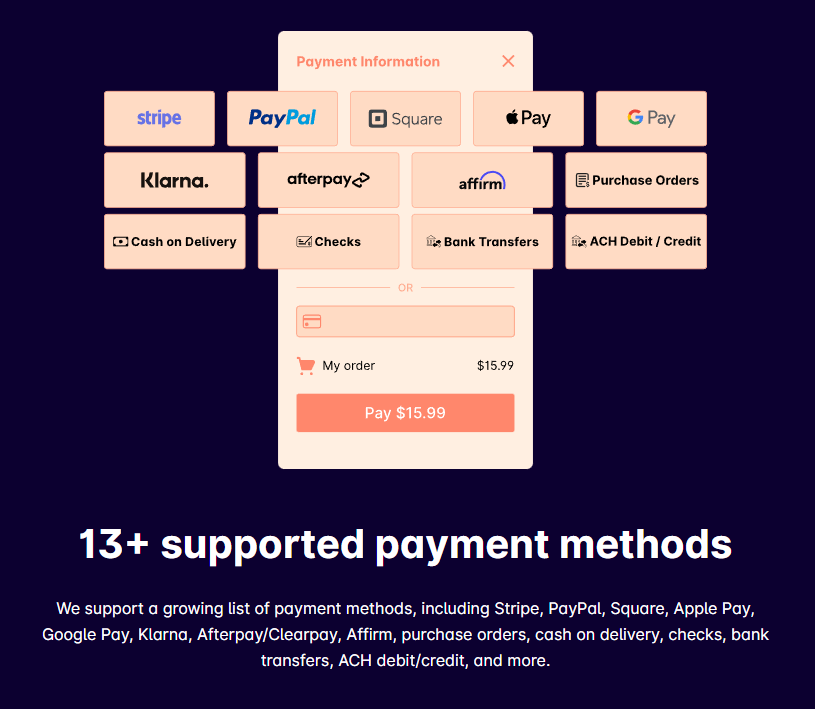
PeachPay is a free plugin that allows you to accept payments directly on your WooCommerce store. It enables you to create a sleek 1-click checkout window, built to combat cart abandonment, that accepts multiple secure payment methods. With PeachPay, you can:
- Easily showcase upsells.
- Enable coupons.
- Allow customers to add delivery notes.
- Customize the design of every element in the checkout layout.
It's easy to set up and use, and it's compatible with a wide range of payment processors, including PayPal, Stripe, and digital wallets like Apple Pay and Google Pay.
PeachPay Makes the Checkout Process Easier
PeachPay enables a one-click checkout flow. This allows customers to form purchases with the payment information needed to complete the acquisition having been entered by the user previously.
In this way, PeachPay gives repeat users access to passwordless one-click checkout no matter which site they are on.
PeachPay Gives You Customization Power
With PeachPay, you can:
- Adjust all aspects of the checkout window design (e.g. color, width, alignment, and overall layout design).
- Dictate the position of the checkout window (left, middle, or right).
- Add and remove checkout fields to enable coupon codes, order notes, etc.
- Adjust language settings and multicurrency settings.
- Set how many products can be bought in a single transaction.
- Control what kind of payment methods are available.
- Choose what product information is displayed in the checkout window.
PeachPay Reduces Cart Abandonment
It is designed for faster checkouts, reducing friction between customers and your checkout flow. This makes the checkout process easier and more streamlined. This can lead to fewer abandoned carts and increased sales.
If you're looking for a way to improve your checkout process, PeachPay is definitely worth considering.
How Do I Set up a Customized Redirect After Checkout?
There are two ways to set up a redirect after checkout in WooCommerce. The first is to add code to your functions.php file, and the second – and much more straightforward – option is to use a plugin.
1. Using Code
You can make multiple code changes or additions to customize the WooCommerce thank you page that you redirect to after checkout. WooCommerce offers a helpful tutorial on how to do this.
Different redirect options can be customized based on several conditions.
-
WooCommerce Redirect After Checkout Per Product – this type of page redirect can be helpful if you want to send customers to a specific landing page or Upsell/Cross-sell offers after they complete their purchase. For example, if someone buys Product A, you can set up a redirect to send them to the landing page for Product B.
-
WooCommerce Redirect After Checkout Based on Country – this can be used to send customers to a localized version of your website or store. For example, if someone is buying from the United States, you can set up a redirect to send them to your .com site. However, if someone is buying from Canada, you can set up a custom URL redirect to send them to your .ca site.
-
WooCommerce Redirect After Checkout Based on Payment Method – this can be useful if you want to offer different post-purchase experiences based on how someone paid. For example, if someone pays with PayPal, you can set up a redirect URL to send them to a thank you page with information on how to use PayPal. However, if someone pays with a credit card, you can set up a redirect to send them to a thank you page with information on how to use their credit card.
-
WooCommerce Redirect After Checkout for Specific Coupon or Product Discount – this can be used to redirect users to a thank you page with information on how to use their coupon or product discount.
However, there are definite downsides to using the coding method to set up your customized redirect after checkout. This method is not recommended because:
-
You must edit your code snippet whenever you want to change the message or offer, which is time-consuming.
-
There is a risk of making mistakes when editing the code, which means you run the risk of breaking your site or showing a poorly formatted thank you page.
2. Using a WooCommerce Plugin
Using a plugin is the best way to set up a WooCommerce custom redirect after checkout. There are many plugins you can use to edit your thank you page, but we recommend NextMove, a powerful yet simple-to-use plugin that allows you to customize your thank you pages. It's also highly affordable in comparison to other plugins.
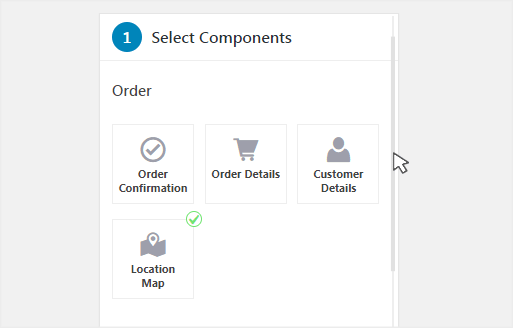
When you activate the NextMove plugin from WordPress.org, it will create a new custom thank you page that you can customize with 17 different premium components.
Let's take a look at some of the components:
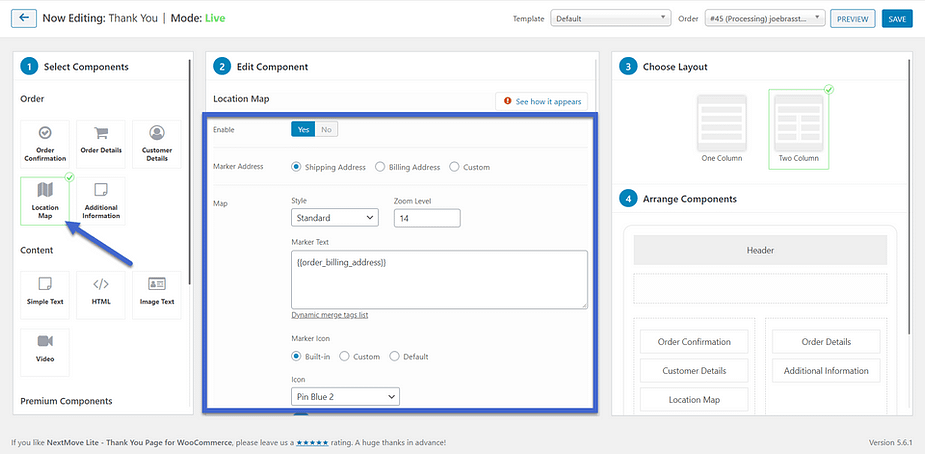
Using NextMove to Add a Location Map
The Location Map component lets you add a map to your thank you page. You can use this component to show your store's location or to highlight where the customer's order is coming from.
This is a great way to add a personal touch to your thank you page by helping the customers visualize and show them that you care about their orders.
Using NextMove to Add a Video
The Video component lets you add a video to your thank you page. You can use this component to show a product demonstration or thank your customers for their orders.
It is straightforward to set up. Turn on the Video component. Add your preferred video, layout, other styling settings, and desired page URL, and you're ready to go.
Using NextMove to Link To Social Media
The Social Share component allows you to offer gifts such as coupon codes in return for a social share from the customer. And who doesn't like free things?
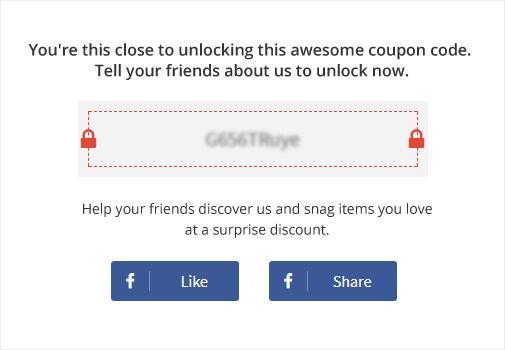
This helps you get business through referrals. This is a win-win for both you and your customers.
There are many other components that you can use to customize your thank you page. NextMove also lets you customize the layout of your thank you page and add custom CSS.
Once you're finished customizing your thank you page, make sure to click 'Save Changes'.
Using PeachPay with NextMove
PeachPay integrates with NextMove to automatically redirect to your personalized thank-you page, keeping your post-checkout experience smooth and fast. Using these two plugins together ensures that your entire checkout process, from the product page right through to the thank you page, is smooth and seamless, which will make your customers want to keep coming back.
Encourage repeat business with a custom redirect after checkout
The post-checkout customer experience is essential. This is where the site visitor becomes a customer. You should ensure you are using a personalized, conversion-optimized thank you page to redirect customers after checkout. This will encourage your customers to keep coming back and help lead to more conversions.
PeachPay integrates with all popular checkout redirect plugins to optimize the entire checkout process. PeachPay helps you create the ultimate 1-click checkout experience, which you can then complement with a checkout redirect plugin to create a custom, optimized thank you page to redirect to after checkout. Using PeachPay, you can even enable personalized upsells and related products at checkout, which you can pair with your chosen redirect plugin to remind customers of products they might be interested in again!
So, what are you waiting for? Start using PeachPay today and see your conversion rate soar!