How to Make the WooCommerce Checkout Into a Pop-up
David Mainayar on | 6 min read
17% of people abandon their cart because the checkout process is too long. A pop-up checkout window is an easy way to streamline your checkout process. It cuts down the steps to purchase and makes checkout frictionless. In doing so, it helps increase the conversion rate for customers who are ready to buy but may turn away frustrated from a complicated or lengthy checkout process.
In this post, we explore how to make the checkout process more user-friendly with a WooCommerce checkout popup.
Why should you use a pop-up for your checkout?
A regular checkout process takes shoppers to the cart page and then to the checkout. This means that customers who want to make a quick purchase will have to go through multiple pages. There's a chance to improve the experience of the ready-to-buy shopper by allowing a direct checkout, and a WooCommerce checkout popup is the fastest solution there is. It offers the following benefits:
-
A faster checkout experience: A checkout popup appears on top of the product page when the shopper clicks on the “Add to Cart” or “Buy Now” button. Buyers can complete the checkout on the same page.
-
More conversions: An inefficient checkout process can affect the conversion rate of your eCommerce store. Speedy checkouts can encourage people to choose you over competitors with complicated checkouts.
-
Reduced cart abandonment: Users have less time to second-guess their purchase and fewer distractions in the checkout flow. Without any checkout friction points, people are less likely to dump their items, and you can avoid losing sales.
A WooCommerce checkout popup is especially useful if you're a:
-
Restaurant looking to provide quick service online to avoid making hungry customers wait!
-
Store that carries discount or mid-range products, and wishes to provide shopping convenience to price-conscious buyers.
-
Store that runs sales frequently and wants to take advantage of buyer impulse with an express checkout!
-
Store with repeat customers who arrive with a clear idea of what they want to buy and who're also familiar with your inventory.
Use PeachPay for your WooCommerce checkout popup
PeachPay is a free checkout plugin for WooCommerce stores. It gives shoppers the option to checkout directly from the page they're on. Buyers are not redirected to the WooCommerce checkout page, rather, they make their purchase from a pop-up window after confirming their details (if already saved) or adding their details (if they're first-time customers).
The benefits of adding PeachPay to your store are:
-
A one-click checkout for returning users: Reduce the checkout process to a single click and provide users with the ultimate convenience.
-
No cost or additional fees: PeachPay is a free plugin with no hidden fees. It gets a small percentage of transaction value directly from the payment provider, meaning it costs you nothing to add PeachPay to your store.
-
Multiple payment options: PeachPay supports 13+ different payment methods, including Stripe, PayPal, Apple Pay, Google Pay, Klarna, and Afterpay.
-
Checkout popup customizations: You can add order notes, product recommendations, discounts/coupons, and customize the checkout fields. You can also configure every aspect of the checkout window design.
Most stores that use PeachPay have seen increases in sales of more than 35%. Online specialty baseball store You Go Pro Baseball saw its conversion rate grow to never before seen heights and gross merchandise value (GMV) increase by 100% after implementing PeachPay. The WooCommerce checkout popup plugin also worked like a charm for LEGO product company MinifigWorks, boosting the conversion rate by 72% within one month of use.
How do you enable a WooCommerce checkout popup using PeachPay?
Setting up your PeachPay checkout popup is easy, and involves three steps:
-
Install and activate the plugin
-
Add payment methods
-
Customize the checkout pop
1. Install and activate PeachPay
You can easily install the PeachPay plugin directly from the PeachPay site, or go to your WordPress dashboard and under “Plugins”, “Add New”, search for “PeachPay” and click “Install Now”.
2. Connect payment methods
PeachPay connects to your Stripe, PayPal, or Square account (among others) to accept payments via credit card with the applicable transaction fees and without any hidden fees. You can also add cash on delivery, check, and bank transfer payment options if you've activated them in WooCommerce.
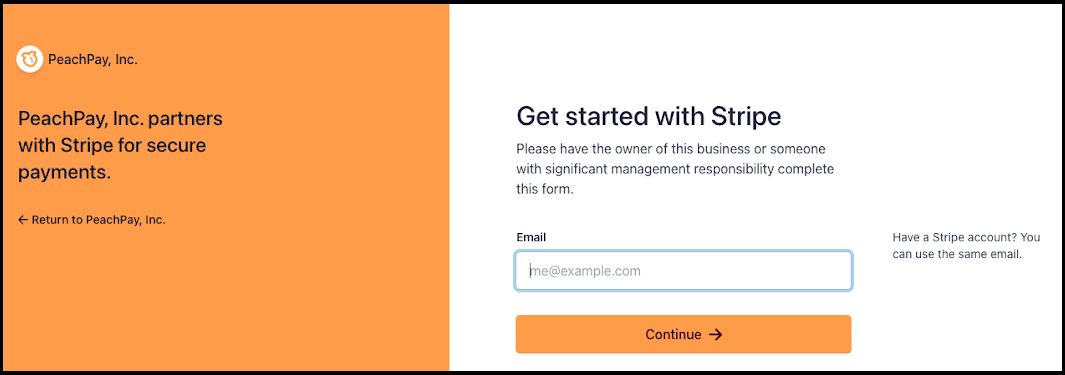
For this example, we’ll imagine Stripe is your preferred payment gateway. After installing PeachPay, navigate to “Payment” and connect your Stripe account.
You will be redirected to the Stripe Connect page. Sign in to your existing Stripe account or create a new one.
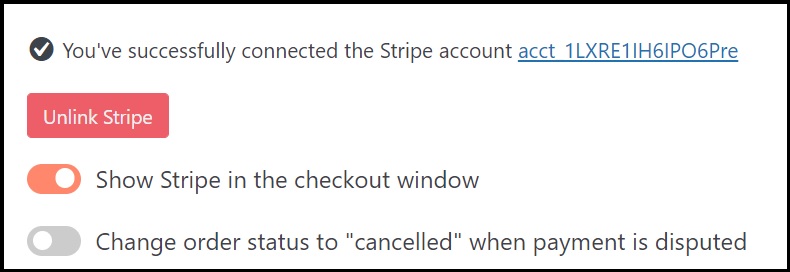
You can confirm that you've linked your Stripe account under “Payment”. You can now start accepting payments via Stripe.
Next, test how WooCommerce credit card payments work using PeachPay.
a. Under Payment > General, activate the “Enable test mode” switch and click “Save changes”.

b. Return to your store. Make sure you're logged in as an administrator.
c. Begin a checkout. When the checkout window opens, you'll see the test mode banner on top and around the window.
d. Enter the required information, and, to make a payment, use the card number 4242 4242 4242 4242 with any future date and CVC. This purchase will appear in your dashboard. You've made your first test purchase.
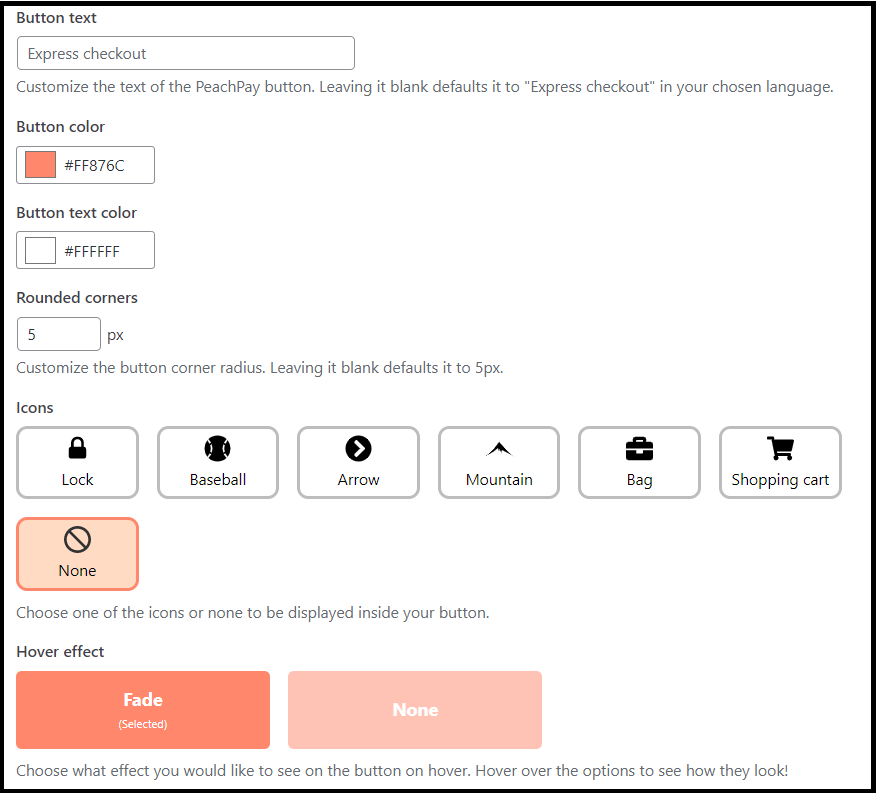
3. Customize the interface
Under “Button Preferences”, you can tailor the appearance of your WooCommerce checkout popup by button color, text color, button corner radius, and hover effect (fade or none). You can even add a shopping cart icon, or another icon of your choice, to the express checkout button.
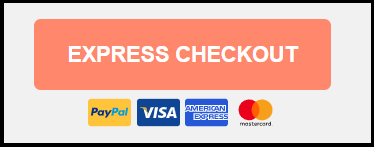
Display payment method icons under the PeachPay button. It will help buyers make a quick decision on how they’d like to pay for the order they’re placing.
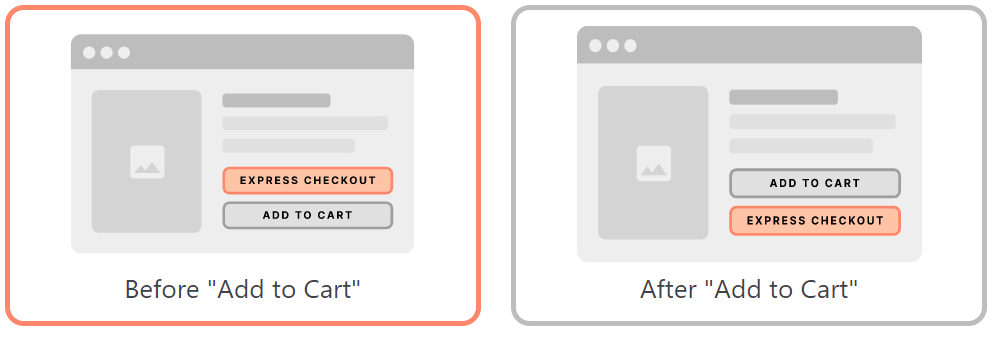
Note that you can still keep the add to cart button, and offer an express checkout as an option. PeachPay allows you to position the WooCommerce cart button above the checkout button or vice-versa.
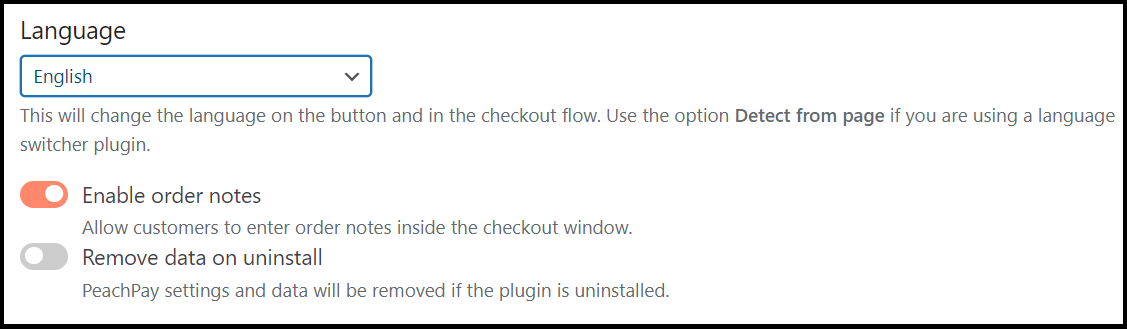
Want to set the language on the checkout button and flow to something other than English? Choose your preferred language or select “Detect from page” if you’re using a language switcher plugin.
Place the WooCommerce checkout popup on the product page or cart page. You can enable the WooCommerce mini/side cart that shows customers all the items they’ve added and allows them to make changes to the shopping cart during the shopping process rather than at checkout.
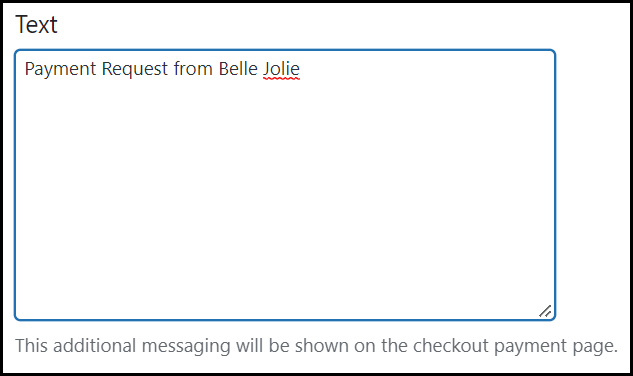
You can make the checkout more friendly with a support message that will show up on the payment page.
On many eCommerce stores, the order summary displays the product images. Featuring the product image is among the checkout customizations available with PeachPay. Another is enabling shoppers to change the order quantity in the WooCommerce checkout popup. It’s something they’ll expect to be able to do if they have a change of heart right before making the payment.

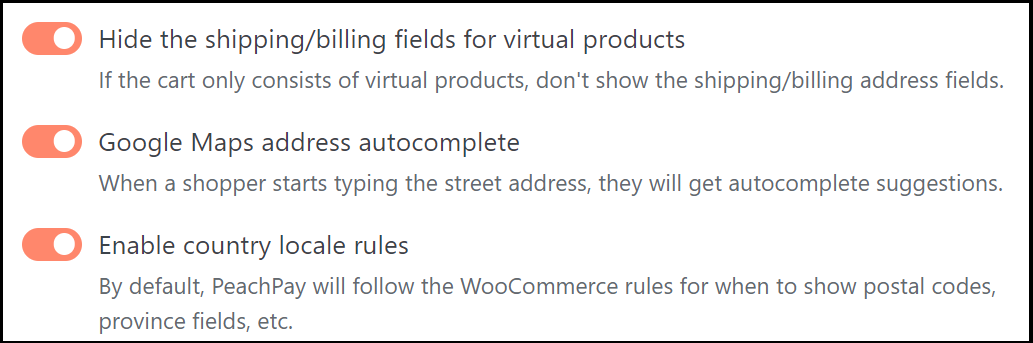
Sell virtual products like music, downloadable games, avatars, ebooks, or photos? Hide the shipping/billing address fields to align your WooCommerce checkout popup to the product.
Enabling “Google Maps autocomplete address”‘ will save customers the time to type out their full address. You can also use the “Enable country locale rules” button to inform PeachPay to pick up postal codes, province fields, and other geolocation details from WooCommerce rules.
How to customize your WooCommerce checkout popup further
PeachPay comes with a host of other features to improve the customer experience.
Checkout fields
When people sign up with your site the first time they make a purchase, they go through the familiar process of entering their name, shipping address, and payment information. This is a pretty long process workflow but once saved, users won’t have to enter their details during subsequent checkouts.
Checkout fields should ideally be customizable – for example, if you ask your customers for their email address, you probably don’t need their phone number and can make it optional. Another possibility is adding a field for order notes, which is recommended if you allow buyers to request product customizations.
These and other customizations, including coupons/discount codes, are available under PeachPay’s checkout field editing settings. Add, remove, or customize checkout fields to get only the necessary information from customers.
Product recommendations
The checkout section commonly features complementary or related products as a tactic to increase the average order value. With PeachPay, you can enable the WooCommerce cross-sells or upsells you’ve already configured, or use automatic recommendations by category, tag, or attributes. In addition, you can choose how recommendations appear in the checkout window.
Enable multi-currency options
If you have international customers, a currency switcher is a convenient feature that converts dollar prices to customers’ native currency. PeachPay shows the currency based on the customer’s billing country. The WordPress plugin supports over 135 currencies. You can set up the frequency of exchange rate auto-updates to every few minutes, hours, weeks, or monthly.
Customizable CSS and JS options for developers
If you have unique customization needs, you can add your own CSS or JavaScript to customize the popup window and button further. For example, to add the PeachPay checkout button in a location other than the default options, enter a CSS selector where the button should appear.
Set up your WooCommerce checkout popup using PeachPay
A checkout popup is an effective way to make the checkout at your store easier and faster, which can help reduce cart abandonment and boost conversions. PeachPay is the best checkout popup plugin for WooCommerce store owners. With multiple payment integrations and a wide range of customization options, you can create a 1-click checkout process on your own terms, helping to ensure your customers complete their purchases.
PeachPay is entirely free to use. Get PeachPay now and create an optimized checkout flow that improves the customer experience and increases sales.