Introduction to WooCommerce Shortcodes
David Mainayar on | 9 min read
Though shortcodes are meant for developers, they aren't difficult to understand for the average WordPress user or WooCommerce store owner. WordPress provides a full list of shortcodes to allow you to customize your website, so once you get a hang of how to use them, you can go about making your website more engaging and improving the overall shopping experience.
One of the keys to delighting your shoppers is the customization of your checkout process. There's a WooCommerce checkout page shortcode for that, and you can, in fact, easily optimize your shop's checkout with a plugin that uses shortcodes. In this post, we help you understand shortcodes better, with a focus on checkout optimization.
What are WooCommerce shortcodes and why should you use them?
As already mentioned, WooCommerce shortcodes are small pieces of code that let you display information in your online shop in various ways. Some examples of what you can use shortcodes for are:
-
Display top-rated products on your Home Page
-
List your most recent products on your Home Page
-
Display WooCommerce products by their attributes
-
Highlight featured products in sidebars
-
Show related products when a customer expresses interest in a product
A shortcode is inserted within square brackets. Each shortcode performs a specific function on your site.
Say you want to add testimonials to your shop page, the shortcode to use is [testimonials], which you can configure over different attributes. You can customize the testimonials layout, such as adding a featured image, arranging testimonials by a certain number of columns, or displaying testimonials in a particular chronological order.
Want to add a coupon code at checkout? Simply use the relevant WooCommerce checkout page shortcode to add coupon codes and other cart bits.
WooCommerce has pre-built shortcodes ready to use, so it's a matter of choosing the right one for the functionality you desire and including the attributes that let you display the content the way you want it to appear. You can create dynamic and engaging product pages that help boost conversions, without having to spend time writing complex code.
Best shortcodes for WooCommerce
The e-commerce platform comes with a number of shortcodes. The most useful ones are mentioned below:
[woocommerce_cart]
The cart shortcode displays the shopping cart on the front end of your site.
[woocommerce_checkout]
This shortcode generates the full checkout page on your website. The checkout page is automatically generated when you install WooCommerce. But you can use the WooCommerce checkout page shortcode to insert the checkout in another area, such as under each product to encourage faster purchasing!
[products]
The products shortcode is one of the widely used WooCommerce shortcodes. It allows you to display products by SKU, list all products or limit it to a certain number of products, list specific products in a grid layout, only retrieve on-sale products, and more.
Say you want to display new books in the standard WooCommerce grid layout. You can use the shortcode [products ids = ''67, 78, 23, 45, 89''].
You can customize further by configuring other parameters such as the number of columns and the date the product was published. For example, if you wanted to display products in four columns, ordered by date in descending order, the shortcode that would apply is: [products ids =''67, 78, 23, 45, 89'' orderby =''date'' columns=''4'' order=''DSC''].
[product _category]
The product category shortcode displays products from a specific product category. You can specify categories by category ids, display a certain number of categories only, use ascending or descending category ordering, and more. To display all your product categories, you'll have to use [product_categories].
[add_to_cart]
This shortcode displays the price and cart button for a single product based on its id.
[woocommerce_order_tracking]
This shortcode shows customers the status of their order when they enter order details.
[Display coupons on any page]
92% of shoppers in 2020 searched for coupons before buying online. Showing coupons across your site's pages can motivate more purchases and support your revenue goals. What you need is the WooCommerce extension Smart Coupons, using which you can display available coupons from your store on the cart, checkout, and My Account pages, and display the coupons on other WooCommerce pages using the shortcode [wc_sc_available_coupons].
[woocommerce_my_account]
This shortcode shows the 'My Account' section where customers can view their order history and update their information. You can specify the number of orders to display; by default, it is set to 15.
How to use shortcodes on a WooCommerce site
There are three ways to add WooCommerce checkout page shortcodes to your site, as explained below:
1. Manually, using the Classic Editor
If you're working in the Classic WordPress TinyMCE editor, you can paste the shortcode directly into the editor.
Steps to follow:
-
Login to the WordPress dashboard
-
Go to 'Pages' and select the page you want to add the shortcode to
-
Click 'Edit'
-
Paste the correct shortcode
-
Click 'Update' to save the changes
2. Manually, using the Block Editor
If you're using the Gutenberg editor, all your shortcodes will work just as they did in the Classic Editor. Here too, you paste the shortcode, but into a shortcode block.
Steps to follow:
-
Login to the WordPress dashboard
-
Go to 'Pages' and select the page you want to add the shortcode to
-
Click 'Edit'
-
Click the '+' button. This will create a shortcode block.
-
Enter your shortcode in the block. You can paste or type the shortcode into the box.
3. Using a plugin
There are many plugins you can use to add shortcodes, including the WooCommerce checkout page shortcode to optimize the checkout experience. The most popular among them is WooCommerce Shortcodes. The free plugin adds a drop-down to the classic editor. A visual editor makes it easy to add shortcode modifiers.
Another popular plugin in this regard is Elementor. It has a dedicated shortcode widget into which you can paste the shortcode. Once you add the shortcode, you can see a preview of the output and determine then and there whether you have the result you wanted.
The recommended method for checkout optimization using shortcodes: PeachPay
Over 12 years of usability testing, Baymard found that 69% of users abandon their cart after having added items to it. What is to blame for this staggering number? The design and flow of checkout frequently are the sole cause of cart abandonment in the midst of checkout.
Your checkout process and page are important aspects of your website design - they determine whether you make a sale or not! A long checkout process or one that takes buyers away from your website to complete payment requires scrutiny. Here's why.
Online shoppers prefer the checkout stage to be as easy and fast as possible. Anyone that has shopped on Amazon, for example, will expect a 1-click checkout from another online retailer. Amazon patented 1-click years ago back when it was primarily a bookseller on the internet. It came off-patent in 2017, giving e-commerce stores the opportunity to optimize their checkout process without worrying about lawsuits.
Shopify has Shop Pay, its one-click payment solution which allows buyers to save their details and payment information for faster future checkouts. With no means to create an accelerated checkout system, WooCommerce users have been at a disadvantage - until now.
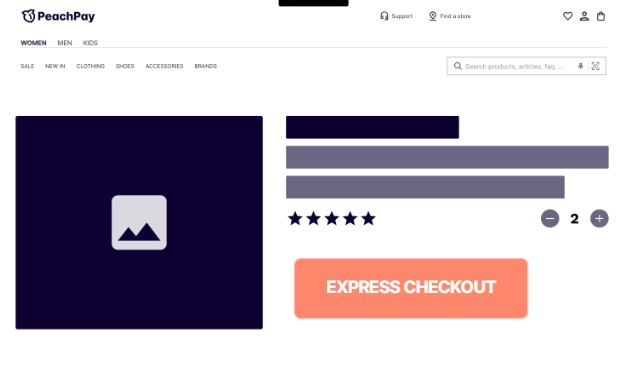
PeachPay for WooCommerce stores enables a faster, better checkout process
PeachPay is a 1-click checkout solution for WooCommerce businesses. Customers only need to enter their shipping information and payment credentials at the time of creating their account with your site or making their first purchase. This information is saved to their account, allowing them to make subsequent purchases with the click of a button. As customers use the same information for most transactions, the 1-click checkout system saves them time over the cart and checkout system.
With PeachPay, checkouts are fast and frictionless. Rather than having to go to a checkout page, your customers can complete their purchase via a checkout window on the product page. With their payment and shipping information in your database, the purchase process comes down to completing payment formalities only.
Supports WordPress shortcodes
You can use shortcodes to add PeachPay to your product pages, checkout page, cart page, sidebar cart, and home/shop gallery pages. Your cart is accessible from various parts of your site, bringing cart and checkout to the same page!
PeachPay supports WordPress shortcodes for custom-placing the checkout button in specific locations of your site. You'll need to use the relevant WooCommerce checkout page shortcode and PeachPay will show up in the desired area.
To use the PeachPay shortcode, add the snipped [peachpay product_id=123] where the number after product_id is the product id you want to show in the checkout window when a shopper clicks the PeachPay button.
You can find the product id by going to your WordPress dashboard and then to 'Products' and hovering over the product you want to show. The product id will display when you hover over the particular item. For a variable product, you'll have to choose one variation to show. Navigate to WP dashboard > Products > The Selected Product > Variations. Here, you can see the id of the product variation you wish to show.
PeachPay makes integrating a faster checkout window into your WooCommerce store easy, with no knowledge of HTML, PHP or CSS required. You can install the solution in minutes.
It's also worth mentioning that you can edit your PeachPay checkout button color, width, alignment, and the whole layout design of your checkout window. In addition, you can add custom checkout fields and display multiple currencies using the multi-currency switcher. All this along with the flexibility to add WooCommerce checkout page shortcodes on specific locations of your site.
Benefits of using PeachPay
As well as enabling a great checkout experience, PeachPay offers functionalities that help boost conversions and customer satisfaction. Here's a look at how PeachPay can make a difference to your top line:
Increases your Average Order Value (AOV) by enabling upsells and cross-sells
Upselling is a technique to encourage buyers to consider a comparably higher-end item than the one they're interested in while on the product page. Cross-selling focuses on motivating shoppers to add a complementary item in addition to the product they have added to their cart while on the cart page. Both tactics are aimed at increasing your average order value. If you have configured upsells and cross-sells natively through WooCommerce, then they will show up in the PeachPay checkout window (the feature can be disabled in the PeachPay settings if you don’t need it).
Reduces the time customers spend on making a purchase
As we've already discussed, PeachPay accelerates checkouts by replacing the rather outdated checkout page with a checkout window. It ensures express checkout, eliminating the pauses between adding a product to the cart and completing the transaction. Fewer steps to place an order and the ability for express checkouts from various site locations - enabled by WooCommerce checkout page shortcodes - elevates the customer experience and boosts conversion rates. Within a month of using PeachPay, LEGO products company MinifigWorks saw a 72% spike in conversion rate.
Enables discounts, coupons and order notes for a customized user journey
Providing a discount or coupon code at checkout can help bring about a successful checkout and reduce the probability of cart abandonment. PeachPay allows you to add coupons and discounts to the checkout window.
Orders notes are a neat feature that let you collect information from customers on how to prepare or pack your order. If you accept requests for product customization, order notes are a handy way to receive customer requirements. They tell customers that you can personalize a product for them and serve as a marketing tool to showcase your capabilities.
Supports many payment methods
Offering multiple payment options helps boost conversions as it gives visitors the flexibility to choose their preferred payment method online. PeachPay supports the biggest and most familiar payment options, including PayPal, Stripe, Google Pay, Apple Pay, and buy now, pay later (BNPL) solutions Klarna and Afterpay, with more expected to be added shortly like Alipay and Square. Once potential customers fill in their payment details, they can use them for all subsequent transactions for faster, smoother checkouts.
PeachPay's stable integration with the most popular online payment processors like PayPal and Stripe has a direct impact on store sales. Online specialty baseball store You Go Pro settled on PeachPay after a frustrating experience with just about every PayPal plugin, and saw conversions climb to a record high.
Make the checkout window accessible on every page of your store
WooCommerce shortcodes allow you to expand the functionality of your site. The checkout is a key area to optimize using shortcodes. There are WooCommerce checkout page shortcodes to do exactly that, and the best way to add them is by using PeachPay as it brings 1-click checkout to every page of your site.
PeachPay supports WordPress shortcodes for positioning the checkout button on the desired locations of your store. You can make the most of WordPress shortcodes to make your best-selling products appear prominently on the page, customize the appearance and placement of the checkout button and enable single-page shopping.
Adding WooCommerce checkout shortcodes using PeachPay requires no technical knowledge. If you know how to insert shortcodes, you'll be able to work with them to optimize user experience and drive conversions.
Note that while shortcodes are shortcuts to writing detailed code, they need to be used correctly to deliver the expected results. Thankfully, troubleshooting WooCommerce shortcodes is a matter of remembering two things: using the right tags and quotation marks.
Using WooCommerce checkout page shortcodes correctly
If you pasted the shortcodes and the display looks different, check whether you've embedded the shortcode between < pre > tags. The tags work to display and not execute the code, leading to an incorrect display. To remove the tags, edit the page and click the 'Text' tab.
The other common mistake is using curly quotation marks (“) when you should be using straight quotation marks ("). The WordPress shortcodes processor has trouble with curly quotes in shortcode attributes, such as [products ids = “67, 78, 23, 45, 89” orderby =“date columns=“4” order=“DSC”], which prevents the shortcodes from working correctly. So, check whether you've used the correct type of quotation mark.
Use WooCommerce shortcodes with PeachPay for a successful online store
PeachPay is the best way to skip the cart page while enabling customers to view the products added to the cart, apply discounts, add upsell products and make payments - without leaving your shop page!
PeachPay is a free solution, so there are no risks to trying it out and understanding how a conversion-optimized and fully configurable checkout window can improve your sales results.
Learn more about PeachPay and give it a go today - set up takes five minutes or less, so it won’t be long until you’re ready to try your new and improved checkout process!