Add a Buy Now Button to Your WooCommerce Store
David Mainayar on | 8 min read
What is a buy now button?
If you've shopped on Amazon, you may have noticed that product pages have two purchase-oriented buttons: “add to cart” and “buy now”. You use the “add to cart” button to add items to your online shopping cart and click on the cart icon to be taken to another page from where you proceed to checkout. The shopping cart screen has upsells and cross-sells that you can consider while you're still in the last leg of purchase.
On the other hand, the “buy now” button facilitates a direct checkout. If you've saved your shipping address and preferred payment option, you just have to confirm your selections and complete payment. In this sense, the WooCommerce buy now button is a shortcut button and a faster route to purchase. And that's exactly why it needs to be on your website.
The case for adding a buy now button
Ponder these benefits of adding a shortcut button that takes shoppers directly to payment on your eCommerce store:
-
Ensure a simpler, faster checkout: UX issues in the checkout process are among the reasons for cart abandonment. Keeping checkout steps to a minimum reduces friction on the shopping path and keeps cart abandonment in check.
-
Motivate people to act: 81% of people have abandoned a form after beginning to fill it out. Keeping form-filling to a minimum, with the buy now button, removes shoppers' mental burden and encourages them to move ahead.
-
Offer immediate gratification: The average checkout time with a buy button is 1 minute and 39 seconds. It jumps to 2 minutes and 53 seconds without it. You can meet shoppers' need for instant gratification with click-to-purchase options under the purchase button.
-
Increase order value: Product recommendations contribute to 10-30% of eCommerce revenues. You have the opportunity to entice shoppers with cross-sells and upsells on the checkout page.
-
Streamline website experience: A clunky website experience can result in order abandonment, costing you sales and credibility. The buy now button is one of many tactics to prevent shoppers from getting distracted and lost on your site, and purchase effortlessly.
All eCommerce stores can benefit from a WooCommerce buy now button. But it is especially useful if you sell daily use items and fast-moving consumer goods. Consumers generally have clear preferences when it comes to packaged foods, soaps, beverages, laundry products, and the like. They're less likely to see reviews and comparisons as they would for, say, electronic gadgets or apparel, and expect a fast checkout.
How do you add a buy now button to your WooCommerce store?
By default, WooCommerce offers an add-to-cart button for every product on the shop page. To add the WooCommerce buy now button, you'll need to add custom code or use a WordPress plugin that offers this functionality.
As there are no WP shortcodes or hooks that let you add the button easily, you'll have to add custom code, and for that, you'll need to be familiar with PHP and WordPress functions. You will come across WordPress tutorials suggesting that you add code to your functions.php file, and while this works, it can also cause issues. Here's why.
Any time you manually make edits to default WooCommerce, you'll need to do it 'safely', that is, avoid errors that cause issues. For example, syntax errors in PHP code lead to the alarming white screen of death. Another problem is the code in functions.php getting overwritten by theme updates. Thankfully, you can prevent these issues from happening in the first place - by using a plugin.
A plugin is the easier and faster way to a WooCommerce buy now button, and it's our recommended method for faster checkouts. In fact, your shoppers can skip the purchase confirmation page entirely and buy straight from the product page they're on. There's a plugin that enables this kind of seamless checkout flow.
PeachPay optimizes your checkout process
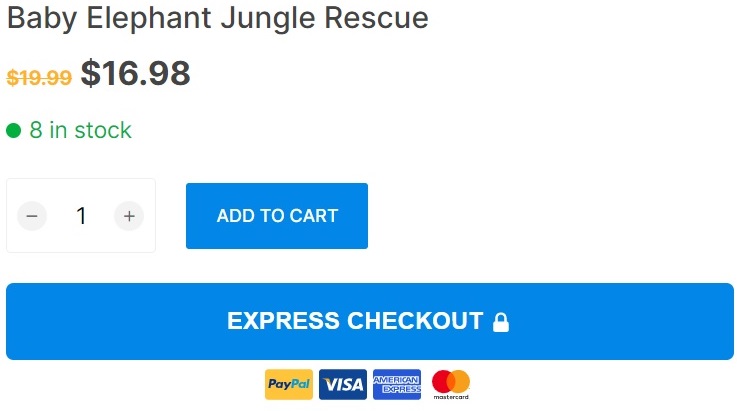
PeachPay is the no-code solution to adding a WooCommerce buy now button. But it doesn't stop at that - it brings checkout to the cart page, allowing buyers to complete their purchase in less than a minute.

When a buyer clicks on the ''Express Checkout'' button, a checkout window opens on-screen, and includes all the typical information necessary to confirm and complete the purchase, and sections for cross-sells/upsells and order notes.
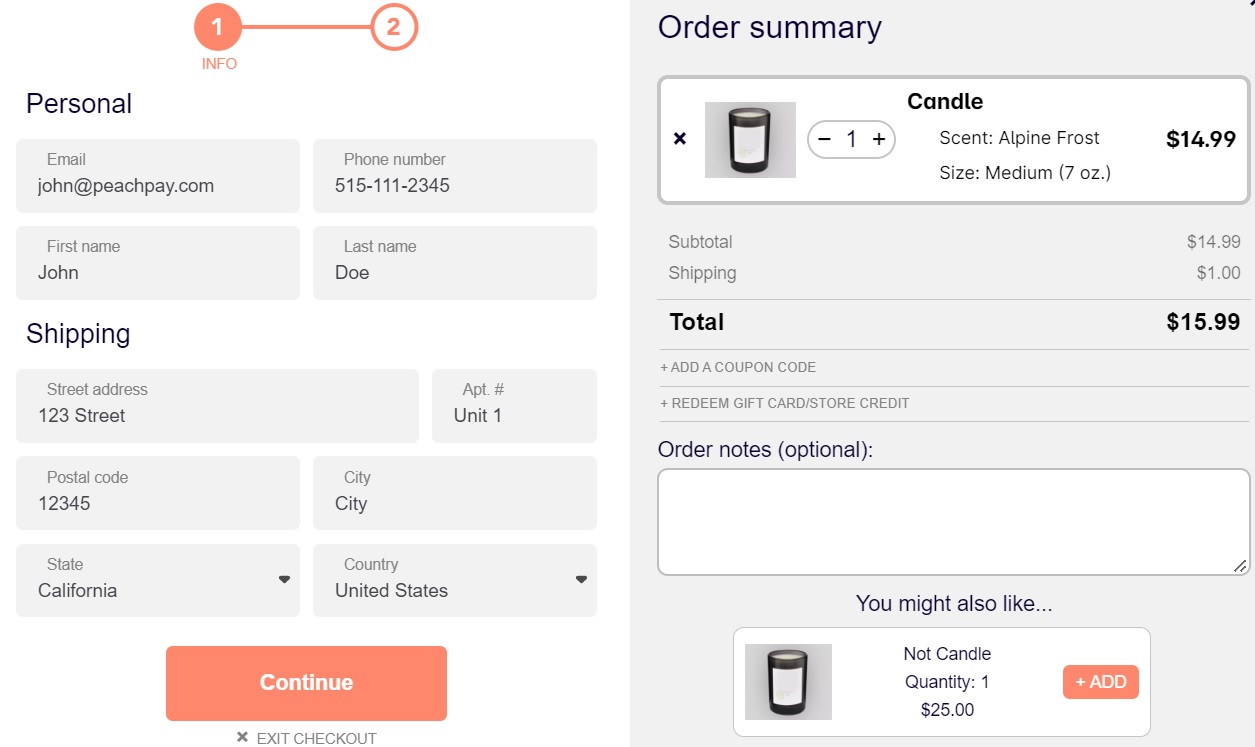
Clicking on ''Continue'' lets the shopper initiate payment from the same window. It's as fast and seamless as that!
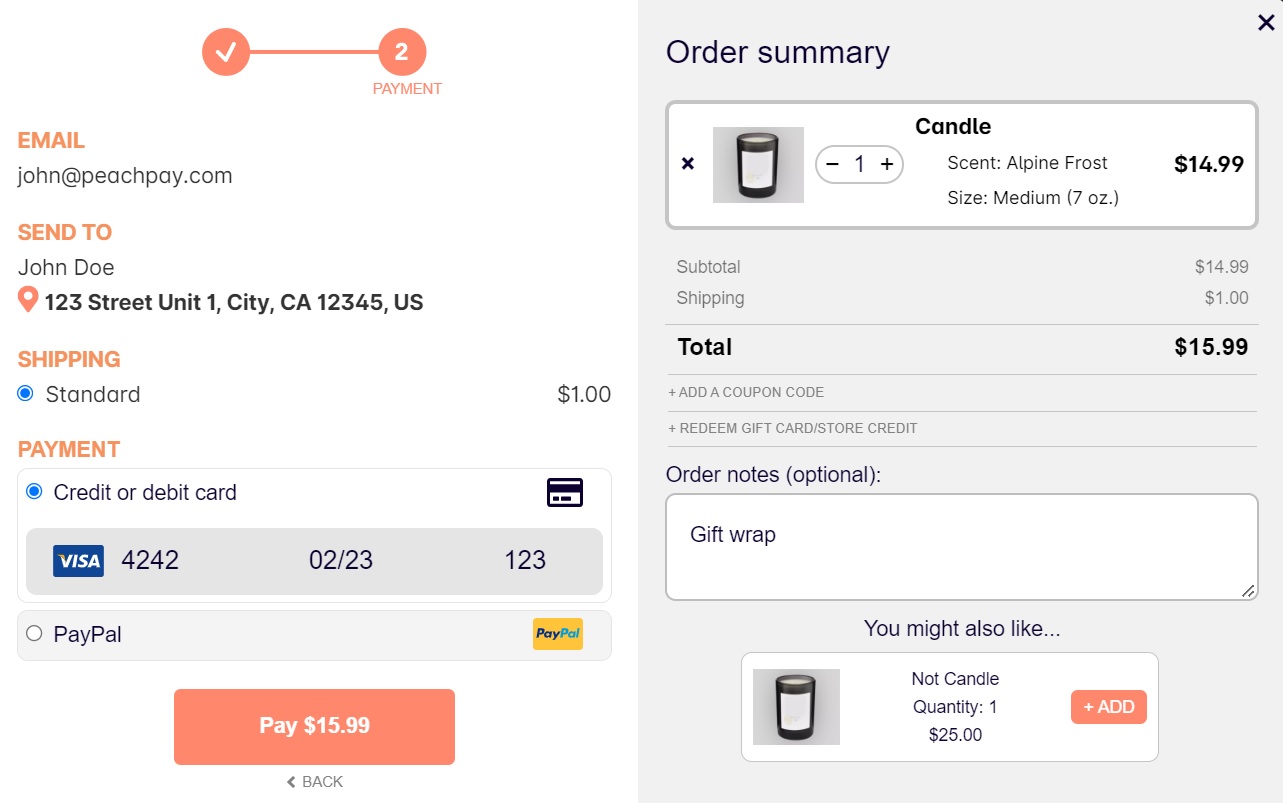
The ''Express Checkout'' can be changed to ''Buy Now'' in the PeachPay plugin settings. You can edit the button color, width, alignment, and the whole layout design of your checkout window. You can choose the fields that should show up in the checkout window, and set the language and multicurrency conversions.
PeachPay integrates with a number of popular WooCommerce payment methods like PayPal, Stripe, Klarna, Apple Pay, Google Pay, Affirm, and AfterPay. You can place payment buttons under the buy now button to clearly indicate your payment offerings.
Visitors signing up with your site can save their personal details like name, email, phone number, shipping address, and preferred payment methods. This makes checkouts even faster as it saves them time in filling out the information required to make a purchase.
The buy now button typically appears on the product pages, but you can add it to your category pages, shop page or any frequently visited page on your site. PeachPay makes this easy by providing a code snippet to add to any page, post, or directly in a theme. You can have a custom buy now button up on your website in the shortest possible time.
PeachPay is a free-to-use WooCommerce plugin. You pay no annual or set-up fees and your transaction fees remain unaffected.
Adding a WooCommerce Buy Now Button with PeachPay: Step-by-Step Tutorial
There are two methods to install the plugin and add a WooCommerce buy now button. You can sign up for PeachPay (it's free!) and follow the guided installation. Or you can install PeachPay the traditional way, from your WordPress dashboard, as explained below.
Step 1
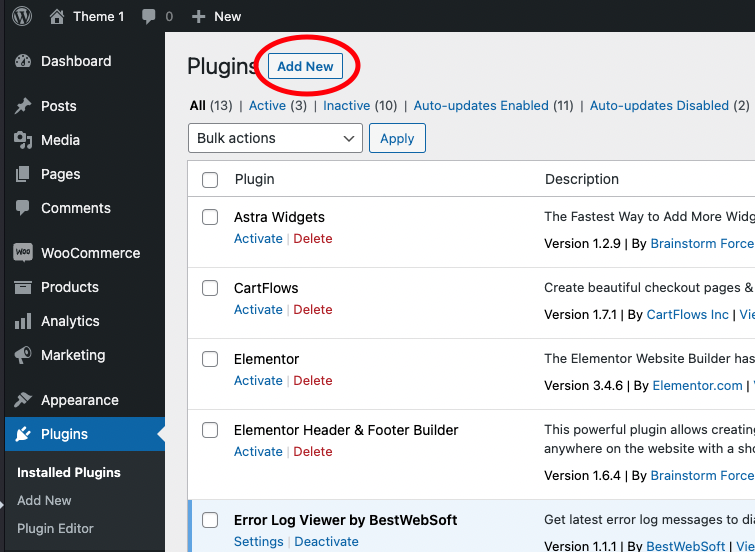
Log in to your WordPress admin account and go to the Plugins tab.
Step 2
After you are in the Plugins tab, click "Add New".
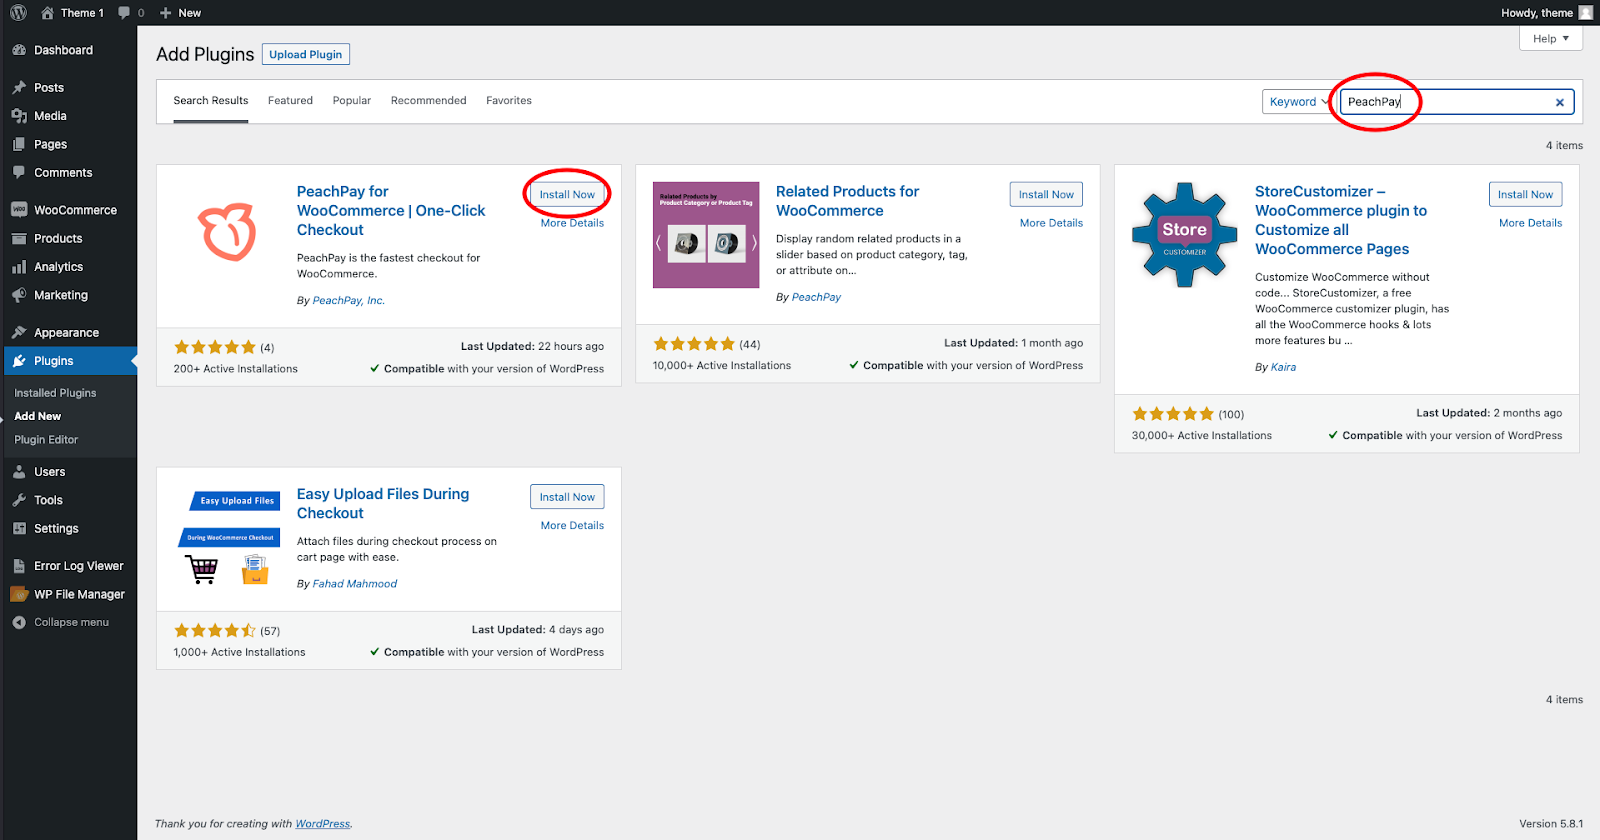
Step 3
Search for "PeachPay" and click "Install Now".
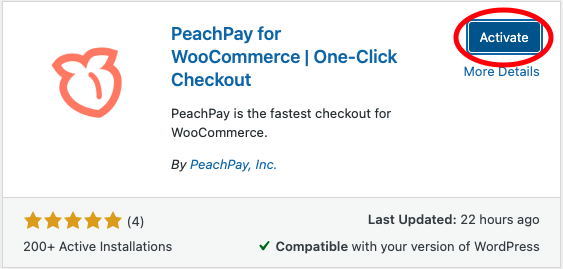
Step 4
Click "Activate".
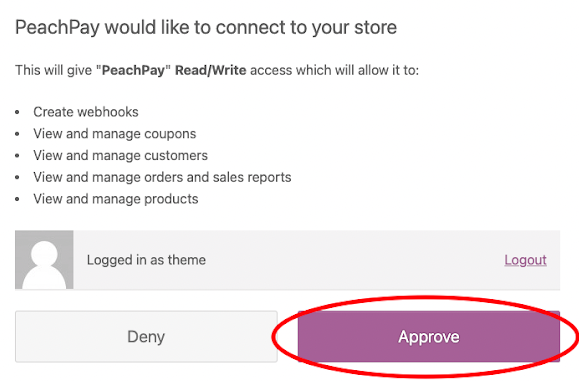
Step 5
After activating PeachPay, you will be redirected to the permissions page. Click "Approve".
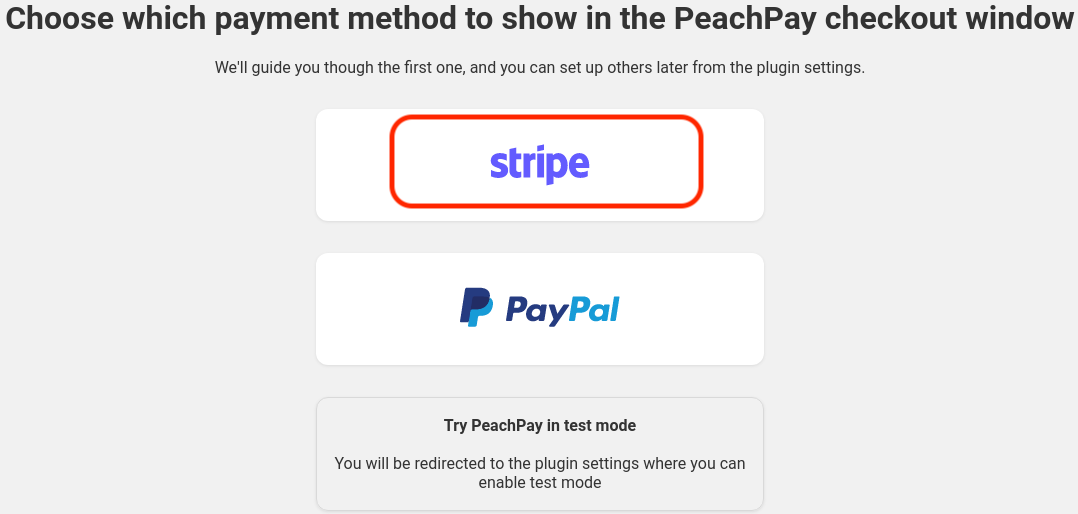
Step 6
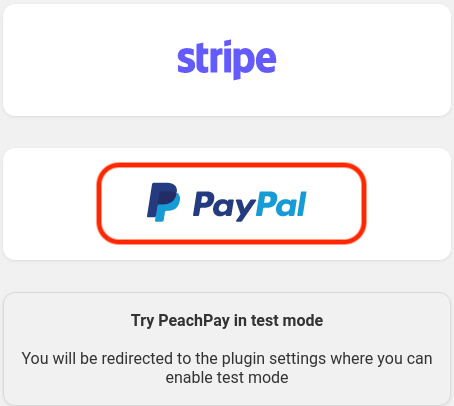
You will be redirected to the payment methods window, where you can connect your Stripe/PayPal account.
Click "Stripe" to add it as a payment method.
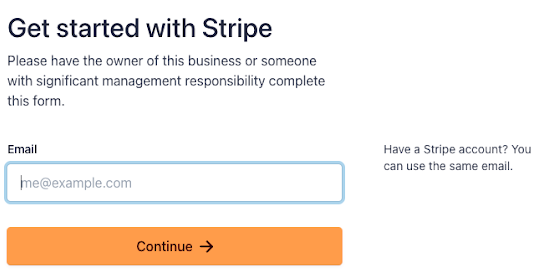
You'll be redirected to the Stripe Connect page, where you can log in with an existing account or create a new one.
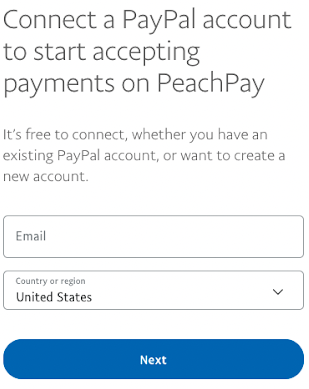
Click "PayPal" to add it as a payment method.
You'll be redirected to the PayPal page, where you can log in with an existing account or create a new one.
Step 7
After you successfully connect your Stripe/PayPal account, you'll be redirected to the PeachPay plugin settings. In the "Payment methods" section, you can confirm that all the payment methods you added are now available at checkout.
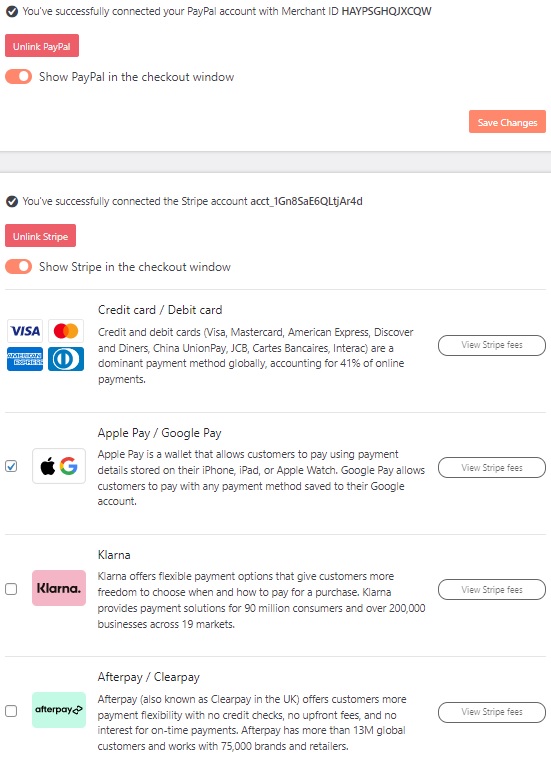
Alternatively, you can make test purchases with PeachPay without spending real money. For the Stripe test mode, use the test card 4242 4242 4242 4242, with expiration 04/24 and CVC 444 to make purchases. This is a safe way to see how PeachPay works before it goes live on your store. In the test mode, only logged-in admins can see PeachPay. Visitors to your site will not see the PeachPay button.
Customize the buy now button for WooCommerce
PeachPay gives you lots of flexibility to define the appearance of your WooCommerce buy now button. Here's a look at the available customizations.
Color
There's abundant research on the psychological effects of colors and how they can be applied to eCommerce checkout buttons. If you want your buy now button to be in a color other than the default peach you get with PeachPay, you can enter your own color with RGB/HSL/HEX codes.

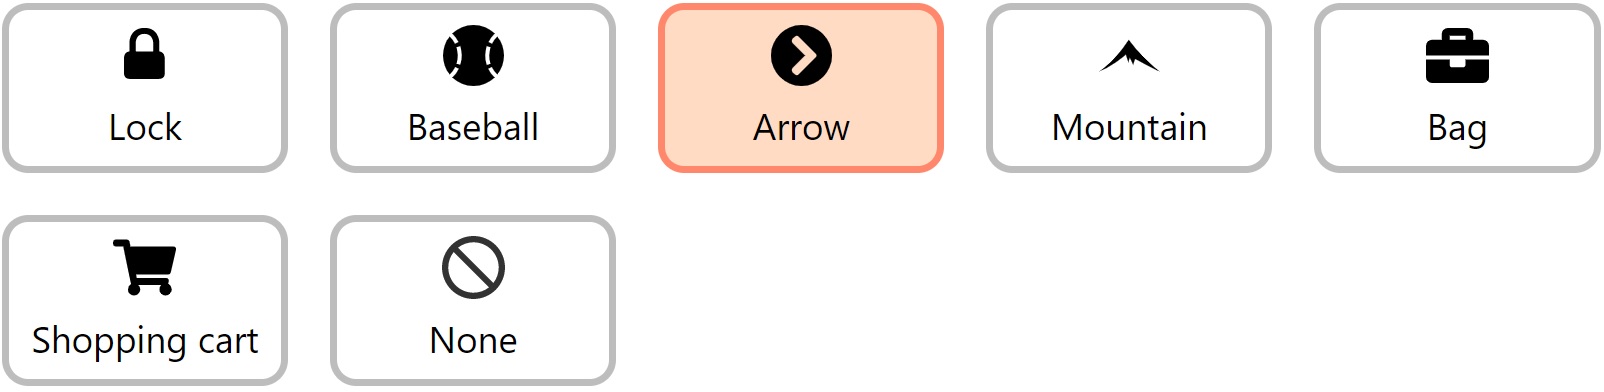
Select icon
You can use the default PeachPay button logo or choose from a list of easily identifiable checkout button icons.
Rounded corners
Choose how rounded the corners of the button should be.
Text
We'd suggest keeping it friendly and familiar. But you do have the opportunity to incite shoppers to buy right away. Leaving the field blank defaults to ''Express Checkout''.

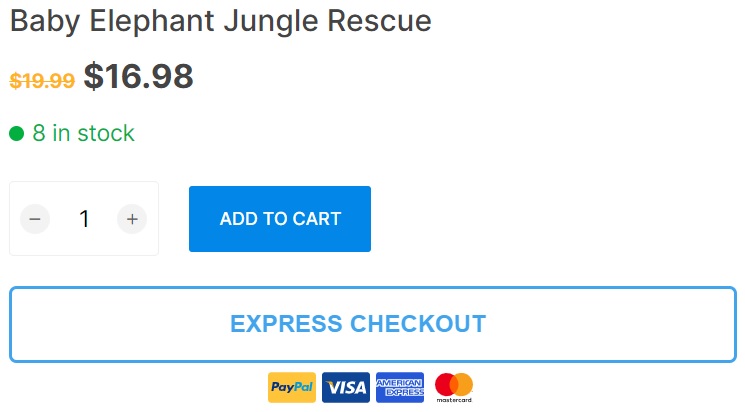
Effect
Hovering on the buy now button can cause a fading effect or the button will remain as is. You can choose either option based on what you'd like shoppers to see.

The example of MinifigWorks below shows how the fade animation works.
Upon hovering on the ''Express Checkout'' button, it fades to white.
Font style
You can make the PeachPay button font style match the theme font.
Width
You can also adjust the width of the PeachPay button for the product page and the cart pages separately. Leaving it blank defaults to 220px.
Alignment
There are four options to align the buy now button: left, right, center, or full. You can adjust the location of the button on the product page and cart pages separately.

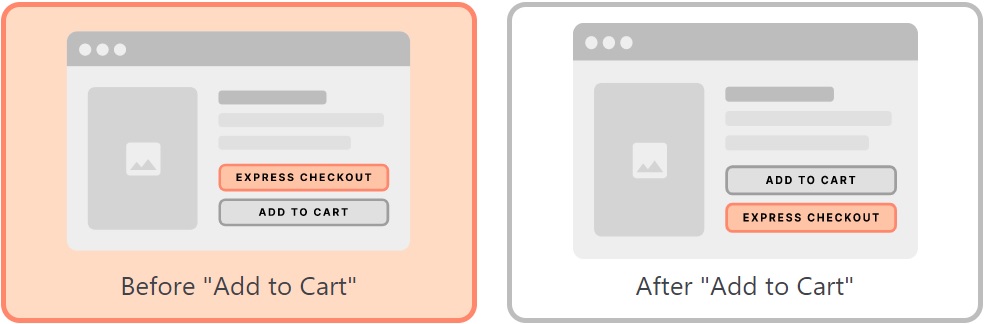
Position
You can give shoppers the option to add items to their cart or checkout directly. Choose whether the PeachPay button appears above or below the add to cart button.
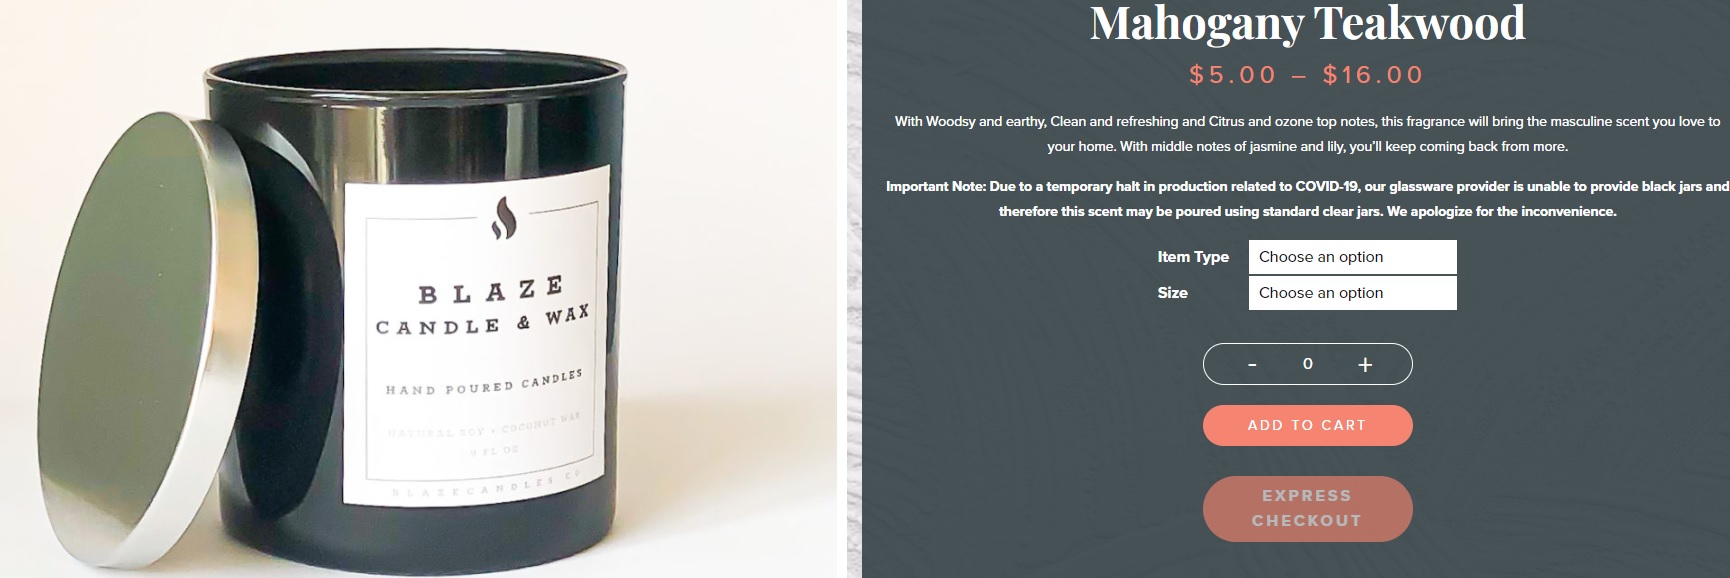
Blaze Candle & Wax has placed the PeachPay buy now button below the add to cart button on their product pages.
Hide payment methods
You can choose to display payment methods below the PeachPay button and see the live preview of your chosen button preferences.

Floating button
The floating button is always available for shoppers on-screen and prompts them to move along the checkout process. You can enable the floating PeachPay button on the shop page, and edit its appearance by button icon, button size, and icon size.
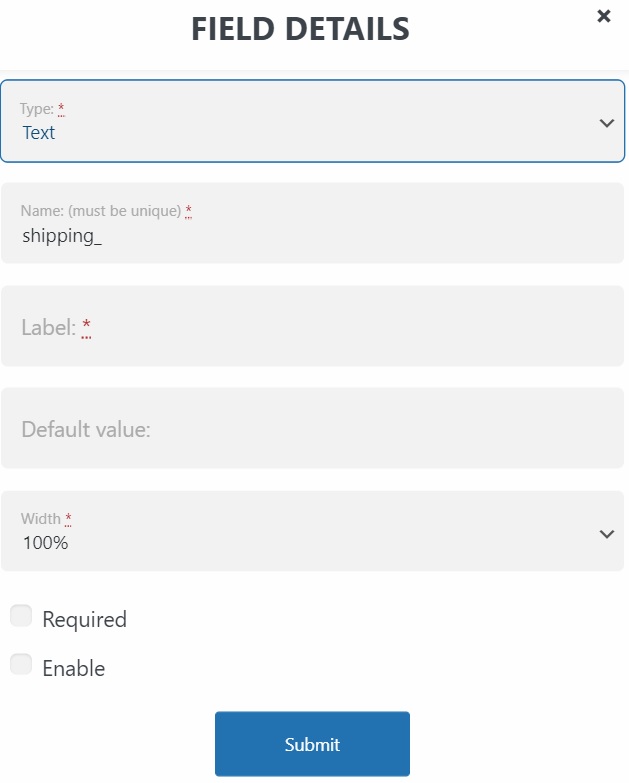
Field Editor
The field editor lets you display additional fields in the PeachPay checkout window. You choose the checkout field type, name, label, default value (if any), and whether it is required or not.
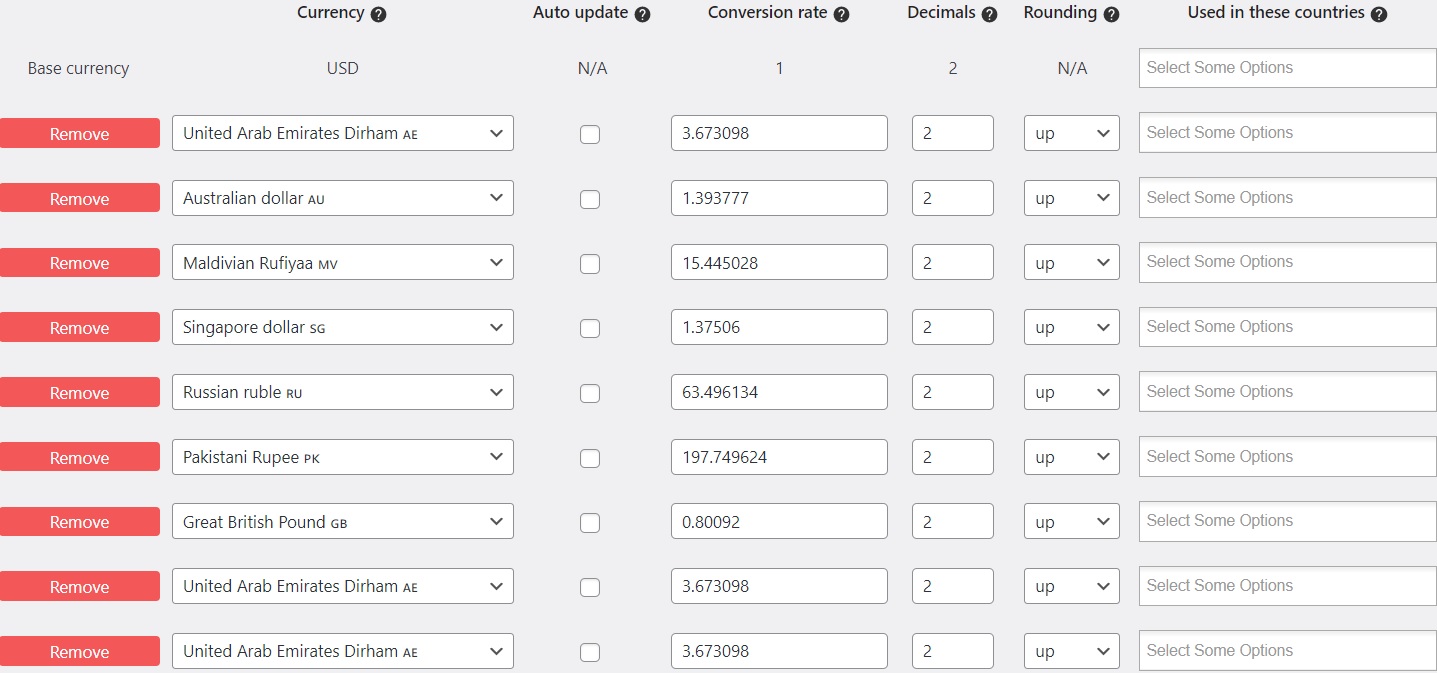
Currency
You can configure a multicurrency dropdown that lets customers choose between different currencies when paying.
Product Recommendations
Upsells and cross-sells inform customers about additional product options they may not know about, and help increase average order value. You can display upsell and cross-sell items you've configured in WooCommerce in the PeachPay checkout window. Choose the number of WooCommerce products you want to display and the heading text, such as ''You may also like'' or ''Recommendations based on items in your cart''.
One-Click Upsell
In addition to the WooCommerce buy now button and upsells/cross-sells in the checkout window, PeachPay also lets you upsell a product during the checkout flow, in a separate pop-up. You can choose when you want the pop-up to appear, such as after payment, upon clicking the PeachPay button, or after the information page but before the payment page. Other customizations possible are adding the upsell text (primary and secondary headers), accept button text and decline button text.
Eliminate checkout issues, boost conversions
The add-to-cart button has a purpose but it's not the fastest route to purchase. A buy now button accelerates checkout and comes in handy especially when shoppers need to buy a single product or return to your online store to buy the same items frequently. At the minimum, a WooCommerce buy now button gives shoppers the choice to buy the way they want, without restricting them to the traditional cart to checkout path.
PeachPay comes with thoughtful features that transform the checkout and overall user experience for the better. The PeachPay button and checkout window are highly and easily customizable. You can add coupon codes to increase order value. Include order notes to allow buyers to leave additional information about their order, such as product customization, gift wrapping, delivery instructions, address landmarks, or dietary requirements.
56% of consumers expect a variety of payments on the checkout page. PeachPay integrates with PayPal and Stripe, as well as Apple Pay, Google Pay, Klarna, Affirm, Afterpay, and more. You can display the payment methods you offer under the buy now button.
PeachPay is easy to set up and configure. You can add a WooCommerce buy now button on product pages, category pages, and any location of your site using a simple shortcode.
PeachPay also offers premium support if you need help or if you have questions about setting up the plugin and customizing your PeachPay button and checkout window. Try PeachPay risk-free to explore how it can transform your checkout process.